Showing posts with label living room and foyer. Show all posts

Wednesday, 14 December 2011

A Christmas Tree Party!

christmas tree party

Well, the time is here! It’s time to share all the magic – there is very little more magical than a tree lit up at Christmas, don’t you agree?

There’s something mesmerizing about the glow from a Christmas tree. It calms me, makes me pause and give thanks, and makes me feel all gooey inside. :)

I’m sharing the three trees we have up at our house with you today. Starting with the Bub’s FUN tree. You know…the one with the colored lights. ;)

Of course, it has all the fun stuff on it, like tinsel and garland and fat Santas. We also hang the Hallmark ornaments the Bub picks out every year on this tree:

Anyone else notice the train theme in most of these? The boy is obsessed. ;)

The Bub and I stalk Hallmark starting early October to check out the new ornaments every year. Yes, we are the ones who love seeing Christmas out that early. Sue us.

I still can’t embrace the white LED Christmas lights, but I LOVE the big fat colored lights:

kid tree

I told my hubby next year I’m doing all the exterior lights in color – they are just too fun and the Bub will only be this age for so long.

We used to have a family room tree every year, but because of some changes I’ve made to that space, we haven't had room for one in a while. I missed having all those pretty ornaments up, so last year I picked up a skinny tree at Lowe’s for a killer deal – only $12!

I LOVE love love the ornaments on this tree – they’re mostly silver and white and glass. Lots of shimmer! They are just gorgeous:

The beautiful baby boy pictures sure don’t hurt either. :) My boy has a December birthday and was and continues to be the BEST Christmas gift I’ve ever received.

Because I knew I’d put this tree in my office, I picked up some blue and green ornaments at Walmart on clearance last year. They go perfectly in the new office! (Which I will show you first thing in January…it’s OH so close!):

white blue green silver tree

I adore this skinny tree – it looks SO real.

Finally, we come to the Big Mama. ;)

I think every year of my life I’ve had a real tree at Christmas – we were just a real tree family growing up and I continued that tradition.

But new hardwood floors kind of changed that. ;) I wasn’t set on it till the guys pulled up the carpet in the front room before the install. There was a HUGE water ring on the plywood, and I stood there for about five minutes trying to figure out what in the heck it was from.

It finally hit me – the Christmas tree. Seven holidays in this house, plus cats who wouldn’t leave the water alone, plus a tree that wouldn’t stand up one year equaled lots of water seepage. Although I’m finding the floors hold up great to spills, we just couldn’t chance a real tree.

Soooo…after much research over the past few months, we ended up with a BEAST from Lowe’s. I wanted a ten foot tree, like we got in a live tree. Hubby wanted to go MONSTER size. So we went with the 12-footer from Lowes.

It was SO easy to put together. The lights are already on it (and don’t go out if one dies) so that saved me hours of work.

But the extra couple of feet meant more ornaments, and next year I think we’ll need a new (taller) ladder to safely decorate the whole thing. ;)

This one is mostly decked out in red and gold, with a few of our most meaningful ornaments mixed in:

IMG_9395 IMG_9384 IMG_9385 IMG_9387

About half of the ornaments are from Walmart – I love their selection! There’s a bunch more from Big Lots and the rest we’ve had for years. It seems our tree has gotten bigger every year, so every year after the holidays I get more. (I like our tree dripping with ornaments.) But this is the tallest it gets people. No. more.

Like always, I use a few yards of faux silk as my tree skirt. I just throw it under there and fluff:

DIY tree skirt

It always works great and with a coupon the fabric was WAY cheaper than a real skirt!

Here she is in all her glory – it’s not easy getting a picture of all of her. ;)

I miss a real tree so much (I found something to help with that I hope to show you soon!), but I gotta say, this is SO much less stress!! A tall real tree is SO heavy and was always hard to get just right in the stand, so I was always worried about it falling. (Since the tree debacle a few years ago I started tying it to wall.)

And not having to water (and not worrying about the animals getting in the water) is the GREATEST!!

Of course…I couldn’t have a Christmas tree post without some night shots. My favorite. :)

So here you go…

IMG_9484red and gold christmas tree

See? Magic. ;)

I LOVE CHRISTMAS!!!

Now let’s see yours! :)

I’d appreciate it if you could link back to TDC in your post and use this pretty button as well:

image

Have fun!

Thursday, 27 October 2011

Halloween up in here

Ummm…people. It will be NOVEMBER in a mere days. What in the world? Less than two months till Christmas! And I still had my beachy vignette up till today. ;)

The new floors kind of put a wrench in the Halloween decor – most of it has been outside till today. But I finally got a little spooky display going with just days to spare!

My Craigslist buffet in the foyer was such a great find – and it’s so fun to snazz it up every season. I love having this space to decorate!:

paper bats on wall

I threw this together today – and when I saw threw it together I’m for real. I had about a one spare hour today and was determined to get some Halloween out!

The Bub and I started with the bats:

bat cut outs on wall

Aren’t they AWESOME?!

We sat at the Silhouette machine for a while the other night cutting out meeellions of bats. (OK, so that part was already done. The rest of the throwing together happened today.)

To keep them from getting too serious, we added some googly eyes to some, some red sticky stones to others:

I did something similar last year, but I wanted to go big this year! I just put them up with sticky tacky stuff and made them “fly” up the wall. 

The vignette was put together with (mostly) items we already had, and just a couple new ones:halloween vignette

We found the black Halloween house earlier this season at HomeGoods. Soooo spooky!

The only other new purchase was the sparkly skeleton that I picked up at Meijer a couple weeks ago (on clearance). I love his bling! And his cute little feet:

 sparkly skeleton

The BOO letters were a craft from a few years ago, and the “art” usually sits on our mantel this time of year:

And of course, I had to bring back the little surprise on the lampshade:

halloween lamp shade

The spider webs and spiders are just black paper and I used little dabs of sticky tack to get them to stay up.

All of that adds up to one festive Halloween display!:

I smile every time I look at it, and the Bub is SO happy we finally got some Halloween inside the house. Just in the nick of time!

Do you decorate much for Halloween? Has the time gotten away from you like it has me?

Tuesday, 18 October 2011

Our “new” house!

Well, they are DONE! The floors are down, sanded and stained. It took the guys yesterday and today to get the quarter round down and painted, and then the furniture back in – so I’ve been smiling and fluffing and giddy all evening. ;)

The house is still (mostly) a mess – but I’ve been trying to get the layer of dust out of a couple rooms to show you the results!

I mentioned before that we went with hardwoods finished on site instead of prefinished. (You can go here to see how we came to that decision.) Remember the dark prefinished sample I fell in love with?:

Well, here’s how ours turned out (same spot):

Yes. I went dark. Not crazy dark. Just dark. er. ish.

;)

The stain color is from Minwax and it’s called Jacobean:

minwax jacobean stain

Originally we were going with a walnut, but then the flooring guy said the Jacobean was just a tad deeper and more brown. Because our laminate had a reddish tone that I wasn’t crazy about anymore, I wanted to go as brown as possible.

I know many of you warned about the dark floors showing everything, and believe me I get you. Our laminate floors weren’t super dark, but dark enough. Every single crumb and waft of cat hair showed, so I’m used to it.

What always bugged me more about our laminate was how shiny they were – it looked GREAT when they were clean, but as soon as someone walked across them with bare feet, they were toast.

The crumbs I can deal with –  it was the footprints and smudges that drove me batty! I wanted dark floors, so I knew just what to do to keep the floors from showing everything. I talked to Floor Guy, and we went with a satin polyurethane instead of a gloss:

satin finish on floors

And it worked like a CHARM!! It’s crazy awesome – you can’t see anything on these floors!

I’M SO EXCITED!!!!!!!!!!!!

Really. I can’t tell you how happy this makes me after trying to keep that blasted laminate clean. ;)

It was pouring rain today, so the guys were in and out over and over to bring in the furniture – with wet boots. (They took great care to cover their shoes up till then – there was no way around it when they brought in furniture.) Two guys with wet shoes walked through that spot up there in the pic at least five times, and that’s how it looks. I didn’t even wipe it down.

I'M SO HAPPY!!!!!!!!!!!!!!!!!!!!

:)

A few of you asked about the baseboards during installation, and we did not remove them. The flooring was placed right up against them and then the quarter round covered any gaps:

dark floors white trim

I know some don’t use quarter round, but in order to do that you’d have to take up all of the baseboards, then reinstall them afterwards.

Um...I had enough of a mess on my hands. ;) I like both looks, with or without the quarter round. But I have to say -- when they installed and painted ours, they made the already awesome floors look stunning. It’s the whole contrast thing for me I’m sure. :)

And many of you were passionate about the quarter round matching the baseboards – I SO agree! I didn’t think of that when our laminate was installed and it matched the floors. It made our already wimpy baseboards look even smaller. I’m SO thrilled to have all white!

I love how the boards each have their own natural characteristics. It looks SO LOVELY. I love this board with the little worm holes:

worm holes in flooring

Each piece stained so differently and it gives our house so much character. Some boards are light, some are dark. Some are super smooth, some have some texture. I am SO thrilled with how it turned out. Beyond thrilled. Ecstatic. :)

So how about some before and afters?!

Here’s the living room before:

And now, with the floors down:

jacobean minwax floors

Of course it was raining and cloudy and perfectly awful picture-taking weather today, so my pictures aren’t great. It was hard to get a decent shot of everything.

The transformation in the family room and kitchen isn’t as dramatic, because the laminate was down before:

image

But you can see all the character in the floors now:

The laminate used to stop by our basement steps, and now that everything is hardwood, it makes our main level feet HUGE:

It’s so funny – we feel like we have a brand new house, but it also feels like it’s been like this forever. I don’t even remember the carpet and laminate, already. Well, I do…but the cherry and animal and Christmas tree stains on the carpet and the dirty laminate are oh so easy to put out of my mind. :)

The change has so many new projects running through my head now too – it’s like my mojo was given a jolt! I’ve already completed a few (small) projects and have a few (HUGE) projects in mind.

Now I hope to get some Halloween decor up (the Bub has been SO patient) and then get our house fallified as well. I’ve been holding out on any decor because of this process. I’ll show you more of the floors and my latest projects soon – hopefully with better light!

Thanks for coming along with us during this project!! Everyone told me and I will say it – (now) I don’t mind at all that the old fridge pooped out on us and leaked everywhere. :) NOW I can say that. Seven weeks later. ;)

Wednesday, 17 August 2011

Pottery Barn pillows (on the cheap!)

pottery barn pillows blue yellow

Well hello! Hope you are having a great week! There has been awesome progress on our outdoor project this week, and I’ll show you that very soon! It is SO exciting to watch an ongoing project that I don’t have to complete myself. It’s an odd feeling to not be doing the work…but pretty a cool one. :)

Anyhoo…so I may have mentioned a few times that I’m nutty for the Pottery Barn catalog. I’m pretty much counting the days till the fall version arrives. (There will be some gleeful squeals. Get ready.)

It’s totally free inspiration, as is a trip through the store. ;) The store version is more dangerous though…cause you may or may not find a couple $3 mercury votive holders you MUST. HAVE.

Or something.

Last week I took a trip though to see if they had fall stuff out check out the inspiration, and I ended up at the table linens area. I noticed a few things – first, they were on sale. SCORE. Secondly, they had so many fantastic napkins, in some fabulous colors and combos.

I put a few together to show how they could work together:

 ikat pottery barnpottery barn napkins

Why would you want to combine napkins in different colors in designs you ask?

To make them into pillows of course! I noticed a trend while there – many of their napkins are also versions of their pillows:

So my brain got to thinkin’. And you know that’s dangerous…for Pottery Barn anyway. ;)

I wanted some late summerish, (almost) fallish pillows in our living room, and wanted to break away from the standard reds and browns I’ve always used. I’ve been pulling in blues over the past year and was determined to make the blues work for fall(ish. It’s not fall yet. I know. Ish.).

I have a love/hate relationship with our sofa in that room – it’s OH so comfy, and actually a great, sturdy couch. It’s just the fabric…oh my dear, it drives me NUTS. And the color, it’s as gold as gold can be. I want to recover it but that’s an entirely different post. Altogether. A long one.

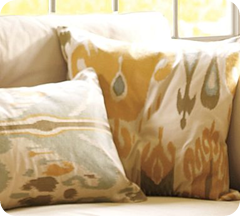
Anyhoo again. I decided to just work with the gold instead of fighting it, and PB had some beautiful yellow and blue combos that I loved! There was an awesome ikat pillow in the store that day:

blue yellow ikat pottery barn

(It was the one on the left but I love both!)

I’ve never been a big ikat girl, and I know it’s trendy, and I’m probably coming in at the end of the trend, and all the sudden I like it. Of course. I’m OK with that. I like what I like, when I like it. Don’t try to make sense of it, your head will hurt. ;)

So I grabbed a couple of napkins and made myself a pillow:

DIY pottery barn

Boom.

Their (embroidered) pillow cover, $59. Mine, I think $8?

I had some fabric for another (upcoming) project, and thought it worked great with the blues in the PB linens. So I made another pillow. LOVE. (I got that blue fabric at Joann’s a couple months ago.)

I found a blue and yellow placemat at PB that day as well, and I knew just what to do with it. I opened the side seam and stuffed it:

pottery barn placemat pillow

Like I’ve shown you here. And a how-to here.

Two Pottery Barn pillows for less than $20 – gotta love it! And I could have made three if I used the ikat napkin on one side and a basic white fabric on the back.

Because I saved so much on those, I splurged on the big blue medallion pillow in the back. I have purchased PB pillow covers before and they hold up GREAT.

But like always, I used a pillow we had to fill it – but it was still a bit wimpy. I hate wimpy pillows. So I stuffed a bed pillow in there:

IMG_6368

I do what it takes. :) It worked great!

And like always…my versions are not for the faint of heart up close. A little rough. So let’s stay far away:

blue and yellow pillows

:)

I’ve been trying to be more adventurous with mixing patterns and colors – the colors in the pillows are in the drapes and I love how they all tie together!

And I love that ikat so darn much I think I’m going to make another one to put on another chair in the room. :)

I have to show you another find for this room! I have wanted to replace our chunky Goodwill coffee table that has been in and out of there:

(Old pic from the red and black days.)

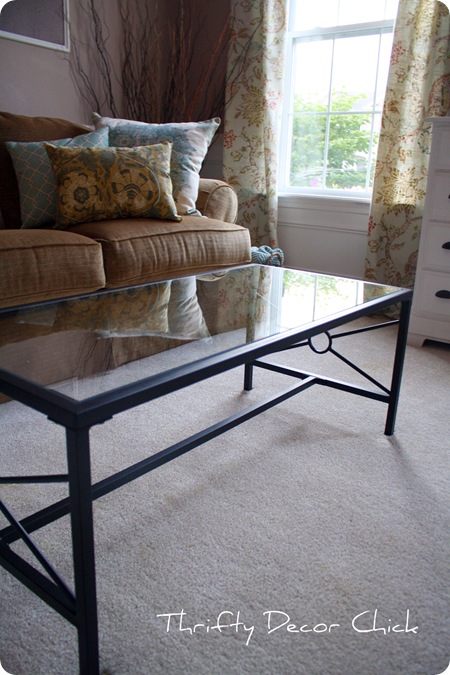
While on a trip to Garden Ridge last week, I found pretty much EXACTLY what I’ve been looking for:

It opens up the space SO much! I LOVE it.

It was $60, but I figure if I sell a couple Craigslist coffee tables (on Craigslist), I’ll make up for that easy. (I've got a couple.)  ;)

I have a few more changes planned for this room, but for now, I’m so happy with how it’s changed over the past year:

The pillows and coffee table have transformed it yet again…for $80. And yet again…I have ensured that Pottery Barn will never advertise on TDC. ;)

You can make pillows out of just about anything – linens, shower curtains, sheets, whatever! The possibilities are endless! Have you made any unconventional pillows? Link to them in the comments if so!