Thursday, 31 March 2011

(Not) Doing it all

Every once and awhile I like to pause and show you the “real” around here. Sometimes I show you in pictures, but today I also want to tell you how very much I don’t have it all together. :)

I’ve mentioned a few times that our house rarely looks perfect. OK, let’s make that never. Well, OK, maybe about five minutes before a party, but that’s it. So that would amount to about 15 minutes a year.

Fifteen minutes a year, it looks pretty darn fantastic. ;)

But the other 525,585 thousand minutes it’s just…normal. I’ve shown you our normal:

image

Uhhh…you don’t have a toilet seat sitting in your bedroom?

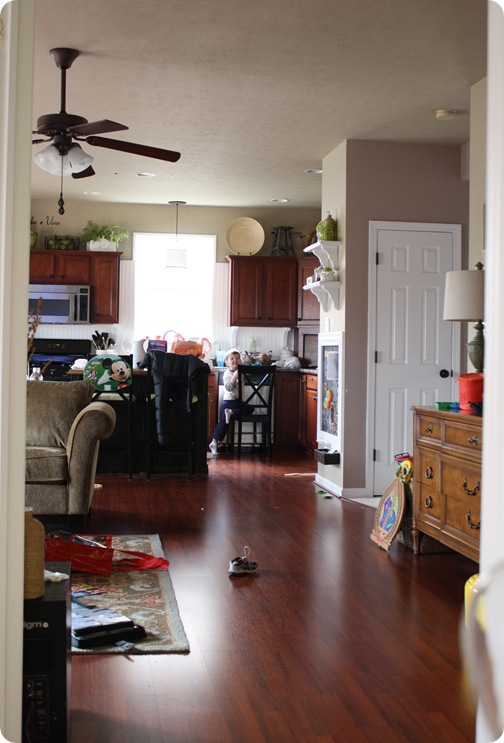
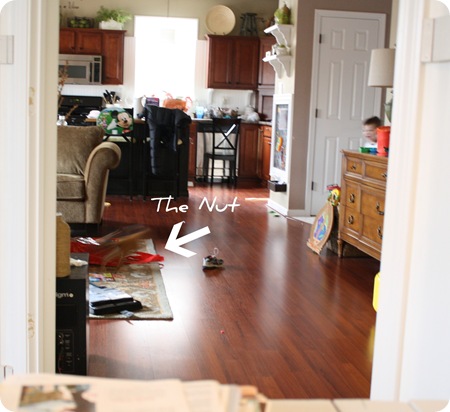
I was sitting in the office working on bills today, and this was my view:

IMG_3736

Not awful, cause there’s a cute Bub smiling at me. ;) Just normal. This is actually pretty clean, really. The floor is cleared enough for us to walk through the family room.

What you can’t really see are the cluttered countertops, the island covered in shopping bags I haven’t emptied, two in-between projects on the windowsill (where else would I keep them?), the coffee table covered with toys and a pizza box. You can’t see the damaged spot on the floor, the messed up drywall on the ceiling from a leak in an upstairs bathroom.

I wanted to write this today because I neverevereverNEVER want anyone who visits this blog to leave feeling inadequate – that breaks my heart. But I certainly understand it -- even I read blogs and feel that green monster raising it’s ugly head. I wonder if the house is always that clean, the toys are always put away. How she does it all, with more kids, a bigger house, a full time job. And I’m lucky to keep one room completely clean for a day.

I’m here to inspire. I want to show you how you can transform your home and make it your haven. But I want to be real about it at the same time. Of course, I chuck the stuff out of pictures – and that’s just because I figure most of the time, you want to see pretty, not cluttery.

But beyond the not-always-perfect-house, I wanted to let you all know that there are so, so, SO many days where I feel like I am barely keeping my head above water – trying to do it all. Keeping the house picked up, let alone clean. Dealing with five animals – a fish, three cats and a puppy. Being a good Mom, an attentive wife, a supportive friend. And trying to post as much as possible here on my beloved blog, which has become my business. (Best. job. ever.)

At least once a week, I feel like an bad friend because I haven’t returned an email or a text or a phone call fast enough. There are days I walk into our house and just feel completely overwhelmed with all that needs to be done. Some days I wonder how it’s possible, as a stay-at-home Mom, I can’t keep our home and lives perfectly perfect all the time.

IMG_37422

And then I’ll realize, yet again…dear LORD, it’s normal. As much as I want to do more projects and post more than I do, I choose not to. I don’t do it all – I don’t want to do it all. I crave a better balance in my life, but I’m guessing, hoping, praying this is normal? All mom’s feel that way at times, right?

But when I say I wouldn’t have it any other way, I truly mean it. Our sometimes messy home means I have a sweet four-year-old running around. It means I take time away from cleaning to work on a DIY project – my passion. It means I get to blog and share and write and (hopefully) inspire…as I am doing right now, with my feet propped up next to the pizza box on the coffee table. ;)

So I guess I just wanted to take a minute to say, I don’t do it all,  and sometimes I feel like I really stink at what I do do. :) But I love my life, all of it’s imperfections and messes. I’m just so completely happy to be doing what I’m doing. With the people I’m doing it with – including you all.

I wanted to let you know that. I never want you to think I’m capable of doing any more than you can do. I just show you the pretty more often than not, because for the most part, I like to see pretty on blogs and magazines and TV. I’ve got enough of the real at home. ;)

But I will keep showing you the messes here and there, cause it’s the truth. We’ve got the pretty and not-so-pretty around here, just like every home. :)

And I luuuurve it!!

Photobucket

Things That Inspire

Tuesday, 29 March 2011

A mossy vignette

Well, if spring isn’t going to show up, I’m going to WILL it here. I’m planting my herbs tomorrow (inside), I’ve refused to wear my coat for the past few days and gosh DARN IT, I am decorating for it.

And if you decorate for it, it will come. That’s my hope anyway. :)

I wanted to spring bling out our foyer and the first project was an easy one. The inspiration came from Pottery Barn:

image

Are you surprised??

Their mossy letters are about 20 inches tall and run about $80 each.

SHUT. UP.

Yowza.

Mine is 23 inches tall and cost me $7. Awww to the YEAH.

I already had one big part of this one project, so that helped the cost a bit. I made a fluffy green Christmas monogram a few years ago:

image

I unraveled the garland and used the honkin’ letter to create my new spring masterpiece:

You can get these cardboard letters in various sizes at Joann’s – I got mine years ago with a coupon so it was only $5.

For this project, I got a huge sheet of mossy stuff:

I got this at Joann’s as well – it was $15 but I had a 40 percent off coupon, and then another 25 percent off my whole purchase. Saawheet.

I used hot glue to adhere the moss to the letter, and kind of cut out the moss as I went. On the curves I cut it so it would fit against the sides flush:

I cut out little triangle shapes to make it lay flat, so I used those to fill it all in later. (You can’t even tell where I glued them on.) Then I trimmed it up and it was done!

Two things if you try this – the hot glue will bleed through the moss sheet, so watch your fingers! For reals. Yikes. And wow – just. WOW. This project is messy:

Thank you Mr. Dyson.

The mess was worth it though -- it turned out just as I had hoped!:

diy mossy letter

I hung it over the mirror, (with hot glue again) but it would also look fantastic on a front door! Because I was too lazy didn’t want to do the back, you could see it was unfinished when I hung it. I used some of that sticky gummy stuff (that you use to hang posters) to hold it to the mirror:

6b7f19

Ahh yes, much better.

I finished off the buffet by working (mostly) with items I already had. My friend Missy was so sweet and sent me some mossy rocks from the Dollar Tree:

mossy rocks

I couldn’t find them at our stores and was thrilled when she found some for me!

I added a few to my iron candleholder from a recent thrifting trip:

I put a nest where the candle should go and perched a little bird inside.

Pretty bird. Yeah, pretty bird. (Name that movie!) :)

I put another nest (you’ll see this is a trend) under a small cloche and called it done for that side:

pottery barn mossy letter

For the other side of the buffet, I used some Spanish moss under a cloche and nestled a small basket with eggs inside:

spanish moss

I am LOVING that Spanish moss! I’ve never used it before and it’s just beautiful. The little basket was a Pottery Barn splurge a couple of months ago – for $6. :)

I put some craft paper through our shredder to create another nest of sorts in an apothecary jar:

craft paper nest

Hello?? Cauute and free!

The largest apothecary jar is filled with more Spanish moss, a small nest and more eggs:

spring apothecary jars

ALL of these eggs were $4 at Joann’s last weekend!

My only purchases for this little vignette were the sheet of moss and the eggs:

I tried placing the three glass pieces on the left on a tray at first, but found I liked the simpler look of the glass on the black buffet:

spring vignette

I love it! Good thing too, cause knowing me, the eggs will still be out in July. :)

I was going for a springy moss look mixed with some glass sophistication:

All done in about an hour and with $10 of (new) supplies. Me likey.

Have you pulled out any spring decor yet? I don’t do much, but you really can’t go wrong with nests, eggs, some green stuff and a bird or two thrown in. ;)

I’m linking this up to my friend Kate’s spring party! (Late to the party as always.)

Thanks for all the great comments on my solution for our paper clutter! You can still enter to win the Sentry Safe here till Friday!

Photobucket

Photobucket

Photobucket

Me Oh My

Sunday, 27 March 2011

The PAPER, organized

Hello all! Hope you had a fabulous weekend! It was absolutely FREEZING here. Ugh – spring is such a tease. :) I guess the planting will have to wait till next weekend. (Crossing fingers.)

If you remember a couple of months ago, I showed you how I was starting to get control over the paper in our house – once and for all. I had let it get waaay out of control, and it was time tame the paper monster around here.

It involved a lot of shredding – make that an INSANE amount of shredding:

But I prevailed people, I prevailed!! I have ridden (ridded?) our home of all the old paper that was creating clutter, found a home for the rest of it, and (pretty much) kept up with what has come into the house since then.

I think I’ve finally figured out a process that works for our house, so I wanted to share it with you. :)

The first couple of steps are total DUH moments, but they’re the ones that were the biggest issues for me in the past. Most days, I get our mail in the car – cause I’m lazy like that.

And that caused my first problem – the mail was piling up in my car daily. Cause I’m lazy. :) I littered my car with it and created a pile I had to catch up with when I did take it inside.

So my first tip for you – get control of how much mail you’re getting. Over the years we’ve changed many of our bills to paperless, so we get emails instead of mail.

I luuurve catalogs like you wouldn’t believe, but sometimes we start getting one we don’t care for and those add to the paper clutter quite a bit. About three years ago, I found a site called Catalog Choice, and so far we’ve unsubscribed from about six catalogs. Love. it. (Cause it works.)

One of my readers mentioned a site a couple of months ago that’s already made a huge difference – Opt Out Prescreen. It allows you to opt out from credit or insurance mail offers (that you have not initiated). It has really cut down on our junk mail, and it only took a couple of weeks for it to kick in.

My next step was to figure out a way to corral all that mail in the car, for the lazy days when I didn’t want to address it immediately. I grabbed an old laptop bag and now it sits next to me every day.

It’s not super large, so once it starts to get full, I know it’s time to address it and take it inside. It’s SO much better than having the paper strewn all over the front seat. My friends and hubby appreciate not having to move a pile of paper when they take a ride. ;)

The next step is to address as much as possible before I get in the house. I’ve had trash bins out in the garage for the mail for over a year now, but I wasn’t using them.

So I put our monster shredder out, next to the the bins:

Part of my paper issues were because I’m a bit of a freak about what we shred -- basically everything. :) I tear our address off of catalogs, prescriptions, junk mail with our address – everything.

So the shred pile was always HUGE. Now, I deal with it before I even walk in the door. It’s SO awesome to walk in with one piece of mail instead of five. ;)

Every Monday I empty the shredder and put the shredded paper and other to-be-recycled items and take them to our local recycling center.

I’m doing it!! I’m actually keeping up with the paper! WHOO HEW!

Next up is getting it taken care of inside. Anything that needs to be addressed but-I’m-not-going-to-address-right-now is put into a decorative box on top of the dresser in my office.

(Cutie little box was from HomeGoods!)

Right now it’s full cause I’m going through magazines and have a ton of inspiration pics to file. Normally, once it gets about half way full, I know it’s time to address it.

Anything left (invoices, utility bills, etc.) that I need to file goes into a bin in the top drawer to be filed in the basement:

But there’s always items I want to keep upstairs, easily accessible. I had tried wall mounted organization before, and they never worked for me. It all seemed to be just another “pile” of papers.

There were three different subjects I needed to keep organized – my inspiration pictures from magazines, stuff for the Bub (notices from school, game instructions, toy assembly) and general household stuff I didn’t want to keep downstairs (instruction manuals, phone numbers, receipts).

And when I saw the cover of Better Homes and Gardens a few months ago, it hit me. paint chip tagsThey had the prettiest, simplest binders and they were exactly what I had been looking for all my life.

Or at least what I had been looking for all of a few weeks. :)

I found them at Naked Binder and I LOVE. But they needed a little somethin’. Some honeysuckle blingity blang. I’ve been adding little touches of that beautiful pink color through the office here and there. Just a smidge. A skosh.

I wanted to label the binders without labeling the binders, you know what I mean? So I busted out my Silhouette and and made some cutie new tags.

I picked out some paint chips in the pretty pink color and used my Silhouette to make images of a house (for the house binder), an idea “cloud” for the inspiration binder (couldn’t decide between the cloud and a lightbulb, but thought the cloud was cuter), and an “E” for the Bub’s binder.

I just cut my tags out of the paint chips like I showed you here, and then glued two back to back, and put my little images (on vinyl) on top:

And they are just the cauuutest (free!) tags I ever did see!:

organizing paper

Precious! :)

The last step of my paper process is to take the to-be-filed box from the drawer downstairs every few weeks or so. I completely reorganized all of our hanging files after I went through all of the paper. Everything is filed by the most basic titles (credit – old credit thankyouverymuch), house, medical, etc.

I wanted to make sure the filing was as simple as possible – no standing there for five minutes trying to figure out where to put each piece of paper.

The hanging folders are organized alphabetically, the taxes by year.

I also have a couple magazine file holders on hubby’s desk down there, near the scanner. I keep the Bub’s artwork in those that I want to scan…eventually.

And finally…I’m DONE. Whew!! :)

Yes, it’s lots of steps. But it’s what works for me. I finally learned that I am NOT a get the mail, take it in, sort, shred, deal with, file it immediately kind of girl. I’m just not. When I was trying to force myself to be that, it didn’t work. I ended up with piles everywhere.

Now I still have piles everywhere, but they’re organized and they have a purpose. Solutions for taming the paper monster are different for everyone – so this may not work for you. But if you’re a procrastinator like me, it may work great. ;)

When I posted about my paper dilemma a couple of months ago, some fine folks from Sentry Safe contacted me about their Fire File:


Which was freaky weird, because while I was in the process of getting our paper under control, I was planning on purchasing this exact product.

We wanted a heavy duty safe for important files that would be fire safe and had a lock, and they read my mind!

They graciously sent me one to use, and I love it. It’s so heavy and sturdy, it’s fire safe up to half an hour, and it comes with a key for security:

If you keep your important documents like insurance info, birth certificates and social security cards at home, this is an ideal place to keep them.

The great news is the fine folks at Sentry Safe want one of you to have one as well!

All you have to do to enter for your own free Sentry Safe is leave a comment here – I’ll leave this open for the week, till Friday the 1st at noon. Remember, if you comment anonymously, please leave your email (write it out using “dot” and “com".)

Hope my crazy getting the paper under control process, or at least a part of it, helps some of you organize the paper insanity in your lives! If you’ve figured out what works for you, are you the git er done kind, or a break it into a million steps kind of chick like me?

I love hearing what works for you! (And it may help someone else!)

Photobucket

Photobucket

Centsational Girl